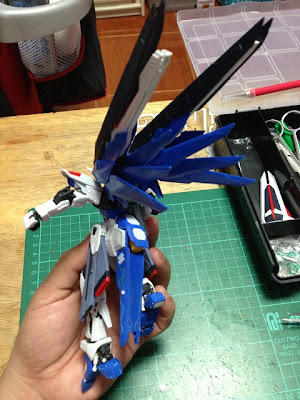
WIP1
WIP2
In my last post I had intended to add waist hydraulics only to the right side, since there wouldn't be any room left in the opposite side when the body was fully bent sideways...I was never happy about that idea...it felt like I was cheating myself into thinking I pulled off a legit waist hydraulic mod. So I decided to rethink my approach, and came up with this:
Click on the Read More link to see the rest of this post!
I trimmed even more plastic off of the internal frame and waist armors, and added these REALLY strong yet surprisingly lightweight Neodymium magnets that I scavenged from busted CD ROM laser assemblies into the torso. They are secured magnetically via two small metal screws I added to the internal frame:
Screws were then added to the hydraulic units so they could be held in place by the magnets:
The end result is well secured hydraulic cylinders with the same, or maybe even more articulation than ball jointed setups:
The new waist design can now dip and twist both ways with the hydraulics installed in both sides.
Another Neodymium magnet was employed to fortify the waist peg connection. The peg itself was drilled and fitted with a screw for extra strength, and the screw head also extends the waist a little bit.
With the waist mods complete, I moved on to plating and scribing some of the parts starting with the chest:
The shoulders were also plated up to appear less flimsy..
Here is the rear skirt detailed up:
and here is the gun beginning to take shape:
I did a test fit to see if the mods are blending well together. Seems ok so far:

I just received news that I may be traveling overseas on business during the next month or so. This may interfere with my plans of submitting this as an entry to the upcoming GBWC in October, but if I cannot submit it this year, then I'll have another full year to work on it until the next event.
Stay tuned!


No comments:
Post a Comment