

Click on the read more link for the rest of this post!
What you will need:
- A computer with the following applications installed:
- Inkscape - a free vector editing software (source)
- Gimp - a free image editing software (source)
- MS Excel
- Any PDF reader such as Adobe
- A decent Inkjet printer using original ink (not continuous ink as it may blot)
- Inkjet Waterslide Paper
- I'm using a product from SCOPA purchased from NBS for those in the PH (source)
- A can of clear gloss - I'm also using SCOPA's clear coat, other brands may work as well.
- Lots and lots of patience and creativity
Before we begin, let me just point out a few important things:
- Inkjet printers DO NOT PRINT WHITE. There is no white ink, so when you try to print something white, the printer only leaves those blank and you are left with the color of your paper instead. This means you cannot print white decals with this method. You need a different kind of printer for that.
- The printer ink is TRANSPARENT, so the decals behave like clear color paint (i.e. a red decal behaves like clear red paint).
- Since the paper we use is white, you can print a blue decal onto it just fine...but if you put that blue decal onto a yellow/ish part, guess what? Your decal will look GREEN. Here's an example of a yellowish decal going onto a blue part:


- Since there is no white, printing lighter colors means the printer is only using less pigment so that the white of the paper shows through more.
- Given the above, this means that colored decals will work best on white parts. Black decals on the other hand, appear to work fine on any color part that isn't too dark.
Now that's out of the way, let's get started!
I like my decals to blend well with the theme and color scheme of my projects. Excel is a great tool for making basic markings since there are wordart templates available, and you can download a huge selection of fonts to suit your theme. If that isn't enough, you can always make your own using shapes. Using a screenshot for reference, I made a PPSE logo by placing several shapes together to form the Ps. I then used WordArt to add the rest of the text.

You don't always have to start from scratch like this. Let's say you wanted to do a Celestial Being decal with some color changes. A quick search on google for Celestial Being should bring up a bunch of logos you can download. TIP: try and find an image in .PNG format. While larger in file size, they tend to have better quality with more solid colors then JPEGs or GIFs. Also use the biggest ones you can find, as they look better when scaled down. Once you have your image file, open it with GIMP.
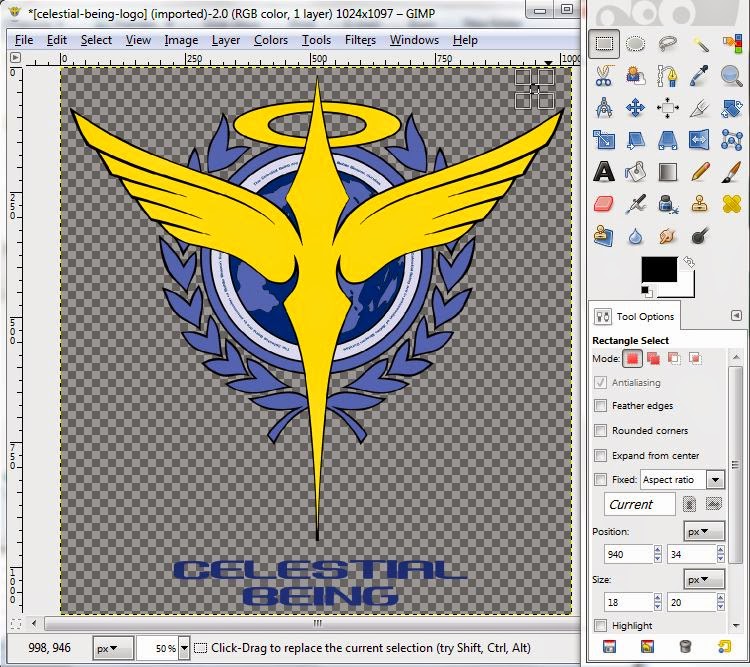
The grey checkered pattern around the image represents transparent sections. Since I'm using a PNG image in this example, the edges are quite clean. If I had used a JPEG source, then the background would have been white, and the colors and edges would be a bit blurred - not very ideal.
GIMP has a lot of useful tools and I'll leave the experimenting to you - but for this example, let's use the color selection tool on the upper right corner of the toolbar. Clicking on this icon and then on a color selects all areas in the image with that color.

If I press delete with the yellows selected, it deletes all the yellows...
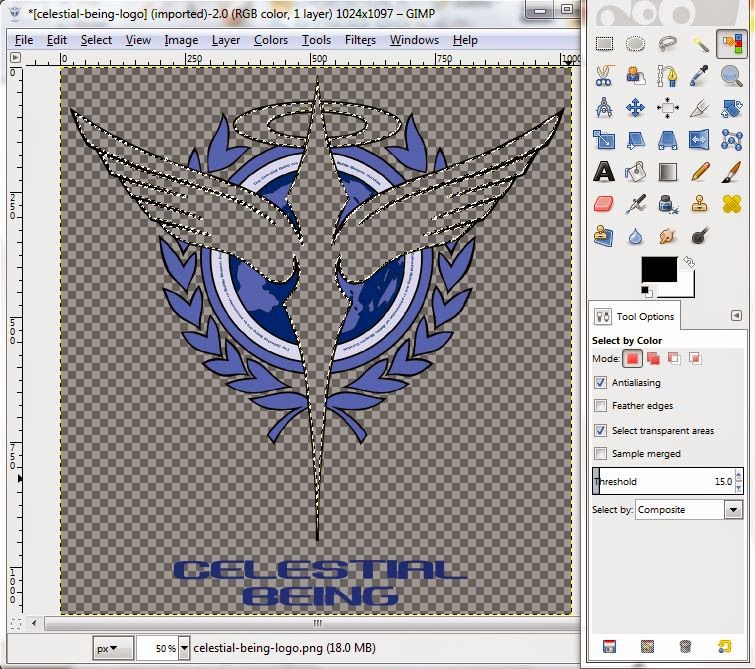
You can also change the color of the highlighted section. Choose a different foreground color and use the Fill tool to color in the highlighted section...


Once you are happy with the image, select the area you want to use, copy it (Right Mouse Button > Edit > Copy) and paste it onto an Excel sheet...

I keep multiple sheets for different projects so I have my designs oganized if I ever need to do a new decal sheet...

Now you can add some word art to the image...

Once you are happy with your custom design, it's time to bring up Inkscape. Here you will arrange the decals on your sheet.

Why am I holding a sheet of paper up to the screen? So I can adjust the zoom level to the exact dimensions of the paper. I want my layout to appear on screen exactly as it would on the paper once printed out. This way I get a good idea of how big the decals are, resize them as needed, and more importantly, see how they will fit on the kit. Adjust the zoom on the lower right hand corner of Inkscape. For my monitor and screen resolution, I found the A4 sheet matches at around 112% zoom. This may be different for you so adjust it as you see fit.

Now copy your design from Excel to Inkscape. It may appear too large on the first try, so scale it down as needed. Inkscape is a Vector editing software, so scaling stuff down should result in crisp images with minimal pixelization, if you get any at all.

Now repeat the process until you fill the sheet with your designs. You can copy and paste in Inkscape to make duplicate decals. Mind the borders, as you don't want to end up with truncated decals when you get to printing. Remember to save your work often (save in Inkscape's default SVG format while designing the sheet).

When your sheet is ready, it's time to do a test print. Save your sheet as SVG, and then save it as a PDF file.

Set DPI to 300 for high qualit and hit Ok.

Now you should have the sheet in PDF format ready for printing. Print it out on regular paper and in low quality first just to see how everything fits. If you find something wrong, go back to Inkscape and make the necessary fixes.

If your test print goes well, go ahead and print it on the waterslide paper! This time do it in high or photo quality. Follow the instructions that come with your brand of decal paper. The SCOPA brand says you should print on the glossy side, let it dry completely, and then apply a thin layer of topcoat. This takes some trial and error - too thin, and the decals will melt when submerged in water...too thick, and you get thick looking decals that are, well, thick. I'm using SCOPA's brand of topcoat, which smells very similar to Bosny or Tamiya topcoats, so it might just be the same stuff.
Here's how mine came out:


Tallgeese Templar is pleased with his new ink...


A few more things to keep in mind:
- Your printer will not cut the decals for you, so be ready to do a lot of trimming.
- Don't be too stingy on decal paper. The closer you put the decals together on your layout, the harder it is to cut them out nicely. Leave some room for your scissors/knife.
- Group decals for a project together so you can cut the sheet up into sections, or group them logically based on how you will be using them.
- Once again, the color of the decal once applied will be affected by the color of the part you are applying it to. Colored decals keep their color best on white or light colored parts.
Give it a try and take your customization to the next level! Goodluck!
Update 3/9/2016: Check out the Downloads page to get a PDF of the decal sheet used in this tutorial!
Update 3/9/2016: Check out the Downloads page to get a PDF of the decal sheet used in this tutorial!
Hi! awesome tutorials sir! btw can you post dl links for those decals? thanks!
ReplyDeleteGlad you like it! A lot of them are my own designs, but the rest are readily available via google. Which one in particular do you need? Can't remember where I got all these, but if it has a word in it, just search for that word in google images and you might be able to find some. Cheers!
DeleteHi, I am that anonymous. I don't know what was I am typing that day but what I am asking on a rough guide. More or less, where you buy papers, what printers do you use. Do you have to seal it after printing? etc.
ReplyDeleteI bought the paper from National BookStore here in the PH. There is a link included in the tutorial where you might be able to order online. I used a regular HP color printer set to photo quality, and yes you have to seal it with clear spray as stated above.
Deletethanks bro :)
DeleteLance here,
DeleteIm a gunlpa fanatic your tutorial is awesome
Dami salamat bro!
Learn a lot from you
by any ways, could it be possible for you to share the raw printable of your custom decals?
ReplyDeleteshoot me an email at pawcesgatchalian@gmail.com ;)
DeleteReally an interesting and informative post. With this article, now we can easily create a decal of any size with any shape, design and color. Designing a decal is a difficult job but this article has now made the designing much easier.
ReplyDeleteHello sir, just curious which National Bookstore branch do you buy the inkjet waterslide decals, as well as the SCOPA transfer solution?
ReplyDeleteBeen looking for these in various Nat'l Bookstore in QC but I haven't had some luck.
I got mine from their branch at Alabang Town Center. I believe the Festival Mall branch also has it. YOu need to ask the attendants behind the glass display cases because the paper isn't kept with the regular printer papers.
ReplyDeleteThanks! :) Found some in the SM North EDSA branch - too bad they don't have the Transfer Solution as well. I might check out ATC/ Festival Mall if they have 'em.
DeleteHi! May i know where you get your decal images from? :) any websites to recommend?
ReplyDeletelook up rokkudecals for some nice sets, or just browse through google images. You're bound to find hi-res graphics that can be scaled down for sharper looking decals.
ReplyDeleteSir may problem po akong na encounter. 'diba po dapat pag nag peel yung decal dapat transparent? Sakin kasi sumasama yung white backing nya.
ReplyDeleteyes it should be transparent because the printed decal adheres to the clear topcoat applied rather than the backing paper..unless you got the wrong kind of paper. Can you send me pics of the paper packaging on facebook? PM me at facebook.com/budgetotaku
DeleteAyun nga po eh. Yan po nakuha ko Scopa Water-slide inkjet decal paper sa NBS nasa P370 taops 5 pcs lang. Yung spray naman na ginamit ko is branded Scopa din worth P150.
DeletePossible po ba na nakulangan lang sya sa spray?
I'd be able to help you out better if you can communicate via FB PM and share some pics of the decal sheet etc.
DeleteSige, sir. Pag uwi ko. Thanks!
DeleteHi! Can I use Bosny Acrylic Spray - Clear as substitute? Having a hard time looking for Scopa. Thanks. Great job!
ReplyDeleteThey usually sell the scopa spray can wherever the scopa decal paper is available, since they are supposed to be used together. I haven't tried using bosny myself so I can't confirm if it works.
DeleteHi, I don't think NBS has this Scopa paper anymore. I also can't find the acrylic spray. Have you tried purchasing thru the Korean seller you linked to in your post?
ReplyDeletehaven't tried purchasing from the site, but I found a listing on OLX from a local reseller: https://www.olx.ph/item/decal-paper-water-slide-stickers-inkjet-printable-ID7aCBa.html?p=1&h=6c778f64a6#6c778f64a6 maybe you can try that instead?
DeleteI'll check at NBS again next time I'm nearby.
hi, would it help if i make the background of the whole decal paper blue just like the rg stickers so that i could have white-printed decals?
ReplyDeleteIf the part you plan on putting it on is white, then you could design a decal with white text on a blue background. You will then end up with white text on blue once the decal is on the part, since the text is left transparent during printing.
Deletethere is white scopa paper
Deleteyes, however the problem with white decal paper is you have to trim it extremely close to your design's border, otherwise there will be a weird white edge around it. Should work ok for warnign sign type decals though.
DeleteI am very much fascinated by this article and it will definitely help us to make custom stickers printing easier to promote businesses.
ReplyDeleteHello, I would like to avail your service. Im located here in manila. I cant find anyone who can print on waterslide decal paper. My project is only simple text but small in size
ReplyDeleteMy apologies if there was some confusion, but I do not offer waterslide decal printing services at this time. If you can get your hands on the paper and decal solution, I'm sure any regular Internet Cafe with a decent inkjet printer can print your designs for you on your own paper, which you can then topcoat yourself. Cheers!
Deletesir any tips po for making decals that are scanned in the printer? Also will there be any problem with the scanned image pag ganun and may add sana ng minor editing lng like mag add ng "2" number.
ReplyDeleteLastly, ang need po ba gawin sa white decals is print them with a white decal paper and a colored background (ex. grey as in grey ang color ng body kit ng gundam) para po makita yun white decals?
sorry mdyo na confuse lng sa article
After scanning, you'll have to trim off the background of the scanned image so only the image you want gets printed. Rule of thumb is if it's on the screen, it will be on the decal, except if it's pure white. For the white decal paper, that could work, just try to get the color of the print as close to your gundam's armor color as possible, mahirap lang talaga i match yung color. Try mo muna sa plain paper, pag match na ang color, saka mo print sa white decal paper. Goodluck!
DeleteI wonder if anyone has tried using other clear coat spray paints besides the one from the same brand.
ReplyDeletepano kukunin yung design if ginawa po yung decals sa excel. nagtry ako pero ayaw mag transparent. laging may white background po .
ReplyDeleteAs explained in the article, you need GIMP to remove the white background.
DeleteAlso, unless you are using an ALPS printer, the white will not be printed. I explained this multiple times in the article, regular inkjet printers do not have white ink.
Delete