Click on the Read More link for the rest of this post...
(WARNING: PIC HEAVY)
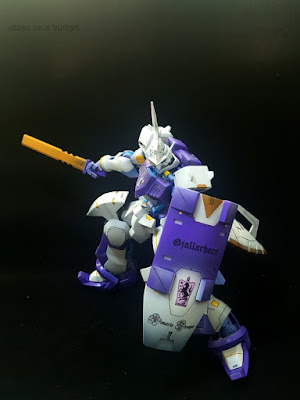
I present to you all my humble entry for this year's GMKC, Kimaris - Knight of Gjallarhorn!
This was no easy straight build let me tell you, and after the event I realized that I may have unnecessarily handicapped myself by choosing to field this one. There were seams on the shoulder armor, the forearms, the head, the side skirts, a long one around the edge of the rear skirt, and a massive one running the entire length of the lance on both sides. I must have spent 3 weeks just fixing all those seams.
Some seam-fixes had to be done over pre-painted frame parts, so extra care had to be taken not to damage the paint underneath. I used up an entire jar of Mr. Primer Surfacer just prepping this model for paint.
For base coats I used Koong's base white for the white and purple parts, and Koong's base gloss black for the gold bits. Modulation pre-shading was done with Mr. Color gloss black. Base coats and post shades are all Mr. Color lacquers. The internal frame is a two-tone blue to purple fade, and the armor's highlights were done with thinned down gloss white for transparency.
Gold accents were either hand painted Vallejo gold, or a custom mixed Mr. Metallic yellow plus some orange to match the Vallejo tone. Tamiya panel line enamel was used to bring out the lines, and a mix of DL model and custom designed decals were applied after sealing the paint with Mr. Hobby clear. A final layer of Mr. Color flat-clear was misted over the parts to blend in the decals with the paint.
I have to admit I had to rush to finish this project in time for the event, and there were some things I still wanted to do that would have made me miss the deadline - but I'm satisfied with the way it turned out. If there's one takeaway from this experience, it's that I need to prepare 3-4 months in advance if I want to finish on time.
That's all for now. Congrats again to all the winners and participants at GMKC2017, and I look forward to doing battle with you again next year! Check back again soon for more tool reviews and random plamo rants, until next time, keep building plamo!


No comments:
Post a Comment