
Good day plamo nerds! I've finally finished relocating all my plamo stuff to the new place, and I'm super stoked (that's what the kids say these days) to get back to work on my mecha projects. But before I pop the cherry of this brand new mecha "talyer" (english: shop), I thought I'd talk about it a little bit and share some photos while it's still a "virgin" so to speak. I've been working out of a plastic bin for years and never really had a dedicated work space up until this point, so you'll have to indulge me a moment as I show off my shiny new cabinet. May she be a vessel of creativity, a fortress of frugality, and a dependable ally as I voyage into the outer reaches of the plamo universe - my very own beast of possibility.

Click on the read more link for the rest of this post...
After an extensive search of stow-away furniture on Pinterest and several episodes of Tiny House Living, I conceived the initial design, consisting of a two-door, wardrobe type structure. At 160cm tall, 80cm wide and 50cm deep, it's a pretty good size for storage, but that's not all it's meant to do. Similar to Banagher's Unicorn Gundam, the cabinet can transform into what I like to call...wait for it...
"Create Mode"


(yes. that just happened. lol.) The main door is hinged at the bottom, which allows it to flip down instead of opening to the side - effectively turning into a good sized desk. The outer panel on the main door is hinged at the top, which - with the help of gravity - stays vertical as the door is flipped down - serving as the left support leg of the desk (since the right is already hinged to the main structure).


So why not just a regular desk? Space issues. The room I'm using doubles as a guest room, so I needed something that was large enough to work on but could be tidied up at a moment's notice.
Apart from the main door, everything else is typical cabinetry design. Some shelves were installed to maximize the vertical space, and there are catches at the top of the main door to hold it closed, with an extra hook for safety.


I managed to screw my old adjustable lamp to one side of the cabinet, such that it can swing out if I need more focused illumination, though the room is pretty well lit between the large window and ample ceiling lights.


The bottom cabinet will house random bric-a-brac, a scraps bin and the compressor, so I'm also thinking about soundproofing down there to keep noise levels in check when I need to pull an all-nighter. The top compartment will serve as a drying shelf for painted parts, and I'm looking into adding some form of dust-free ventilation to that part of the cab.


For airbrushing ventilation and overspray management, I purchased a good sized centrifugal type exhaust fan, mounted an A4 sized plastic document binder to the front and turned it into a collapsible spraybooth. Here are some pics of the build:


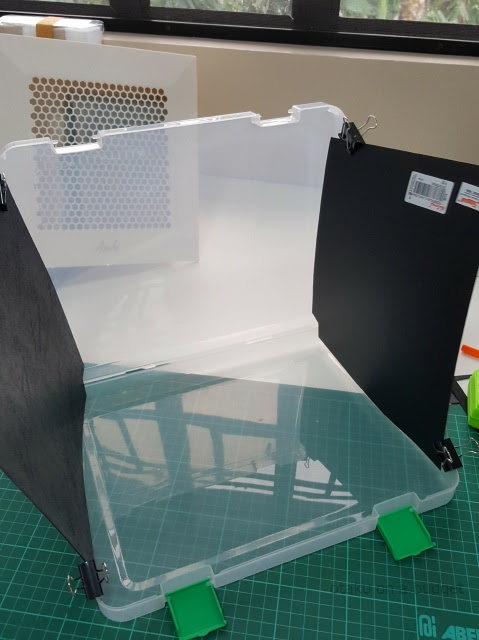


The exhaust fan itself is a great design. It has a squirrel-cage type extractor that claims a decent 3 cubic meters per minute (about 106 cfm), with an easily removable front grill. All it needs now is filter media cut to A4 size and it's good to go.


It's not the best looking booth but it's lightweight, takes up minimal space in the cabinet when not in use (which in my experience can be for months at a time) and only costs less than Php1500 (USD 30) to put together. The materials for the cabinet itself came up to around Php 4500 (USD 90) with the marine plywood being the most expensive, but it's still significantly cheaper than a store-bought cabinet this size that isn't even purpose-built.
Thanks for the memories plastic bin, it's been great but...


...I got a new bae!
 |
| I wonder how long I can keep it pristine white... |
I've got a lot lined up in terms of workspace optimization, but I'm open to more ideas...which is why I thought this would be a great way to kick-off another series on the blog, entitled - you guessed it - Talyer Talk!
" Plamo Like a Sir. "The Talyer (english: Shop) Talk series will showcase notable workspaces and ingenious hacks from anyone in the community with something interesting to share about their plamo work area. Whether you're rocking top of the line equipment in a dedicated plamo room, or working with DIY recycled or upcylced tools in a cramped corner, if you plamo like a Sir and want to divulge your dapper doohickeys, drop me a line at facebook.com/budgetotaku!
Until next time, keep building plamo!
Awesome desk!
ReplyDeleteThanks! I'm quite proud of it :)
Delete