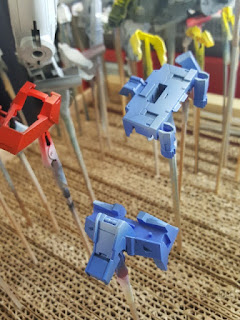
 Happy Easter plamo nerds! I'm sure most of you spent the long weekend in far off places, basking in the sun and getting some much needed RnR. Me? I chose to stay home so I could put the Renegade Krome through it's paces. I had just received my copy of Modulation for Mecha by ace modeler Oishi, and after flipping through it, I decided the Devil Arts Providence would be the perfect candidate for my first attempt at modulation.
The DA Providence already comes well detailed out of the box, and aside from a few seams on the backpack and the weapon that needed fixing, it was the only kit in my backlog that would take minimal paint prep. I've only done a few out-of-the-box builds, so this should be a great learning experience. Not only will I get to try a new painting technique, but I also get to gain experience with the Krome. Jump in if you'd like to see my progress over the extended weekend!
Click on the Read More link for the rest of this post...
After fixing the seams, I primed everything with Mr. Surfacer 1200. I used the Master G233 to lay down the primer, as I didn't want to over-thin it just to get it to spray properly in the Krome. The primer revealed a few more mold lines, which I sanded down with 800 and 1000 grit sandpaper.
The Providence is mostly grey in color to begin with, so the grey primer base means I get to skip laying down the base color step in Oishi's guidebook. I applied my shadow color, Mr. Color gloss black, using the Krome equipped with the .21 needle. It took some trial and error to get the thinning ratio right, as even the standard milk-like consistency seemed to cause tip-dry fairly often at 25 psi. I immediately appreciated the open tip design, because I could easily just pick the dry paint off of the needle with a cleaner soaked q-tip.
Once I got the ratio right, it sprayed like a dream. The paint came out in a very fine mist, and thanks to the precise needle limiter, I was able to keep overspray to a minimum. I cheated with some masking tape whenever I needed hard lines on some of the edges, but most of it was done freehand. As opposed to the traditional pre-shading technique where you apply a dark color around the perimeter of a surface that fades towards the middle, Modulation (as I understand it) calls for semi-realistic "shadows" that fade from one side of the panel towards a highlight on the opposite side. Edges can be exaggerated by placing a "shadow" next to the "highlight" of an adjacent panel, as seen in the skirt piece above. This reduces realism in that the simulated light source will not be standard across the entire model, but it does make it look more interesting.
Next, I swapped in the .33 setup and sprayed on the grey paint coat, using a mix of Mr. Color white darkened with a few drops of black and blue. This toned down the shadows and blended them in to make them look more natural. I may have overdone it a little in this step as I underestimated the opacity of the custom grey mix I made, but I can always lay down more black (or clear smoke) later to get the darker shadows back.
With the grey parts coated, I worked on the colored bits. I misted blue, yellow and red over the colored parts respectively. I picked out some grey parts and painted them blue and yellow to add color to the mostly grey OOB color scheme. Unfortunately I overdid this step again. Oishi does emphasize in his book that the base color needs to go on first before the shadows, but I just had to find this out the hard way. You tend to over-saturate the parts with color to build up the tone you want, and having the shadows down before this step means they can end up getting drowned out. Lesson learned.
I decided to just do a post shade later on to bring back some of the shadows I covered up, and proceeded with the white highlights after switching back to the .21 configuration. After understanding how opaque this paint is, I over diluted some Mr. Color white, dialed down the psi to about 20 and was able to spray smooth, translucent layers. This time I had much more control building up the white highlights.
I'm really excited to see the kit assembled. After I apply all the highlights I'll be working in sub assemblies again so I can balance the shadows throughout the kit. The Krome has been performing really well so far, and I'm enjoying the threadless nozzle so much that I'm cleaning it more than I actually need to. Stay tuned for updates on this build, and a full review of the Renegade Krome!
Until next time, keep building plamo!


No comments:
Post a Comment