 Hello again plamo nerds! Due to insistent public demand (actually just one reader, persistent fellow, by the name of Clyde..) I'm doing a double feature today, demonstrating how to remove an already dry waterslide decal. Note however that this method may not work on all decal brands, but I've had success with both Bandai and self-printed decals, provided the decal solution has not fully cured and the model was not topcoated after the decals were placed.
Click on the Read More link for the rest of this post...
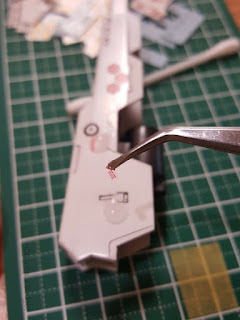
I placed these small ver. ka style decals on the Boros' gun, and after a few days decided that they jump out too much in red, so I thought I'd replace them. First I add a droplet of water over the decals and let them soak for a few minutes...
Next, I take my hobby tweezers and gently push against the edge of the decals, careful not to scratch the paint job. Once the edge of the decal lifts even the slightest bit, you'll see water force it's way under it, and the decal should lift off of the surface of the part.
With the decals now floating on the surface of the water I simply grab them with the tweezers, and clean the water off with paper towel.
I apply the new decals - going with grey this time, so they're not too prominent.
That's all there is to it! Stay tuned for more modeling hacks.
Until next time, keep building plamo!


good to see that you're active sa blogging uli sir. :)
ReplyDeletesalamat sa pag share..