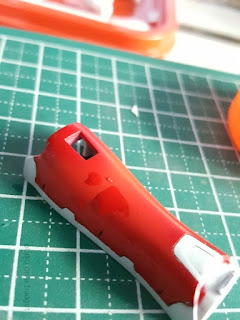
Here's what you'll need:
- Sharp scissors
- Hobby knife with a new blade
- Cutting mat
- A small, shallow dish for water
- Hobby tweezers
- Cotton swabs and paper towel
- Your waterslide decal sheet
- (Optional) Decal solution like Microsol / Mr. Mark Softer, or just plain white vinegar
Click on the Read More link for the rest of this post...
Waterslide decals must be applied to a glossy surface, so make sure the parts you plan to decal up have either been gloss-coated or are painted in gloss paint. Find a clean place to work on to avoid getting any dust under you decals or in your water dish. If you're working with a standard decal sheet that comes with a placement guide, you can work with that. I prefer freestyling my decals, so I just pick and place as I see fit. Select the decal you want to use on your part and carefully cut it out of the sheet.
Some aftermarket decals do not come pre-cut, such as when you print your own. In that case you'll have to trim around the design, as close as you are comfortable with. Use a sharp hobby knife to slice away all the unnecessary edges that your scissors can't reach.
Do a test fit by placing the decal over the part to get a general idea of how you will position it. Once you're satisfied with the placement, soak the decal in water, paper side down, decal side up.
While the decal paper is soaking in the water, clean up the surface of your part to make sure it is dust free. Put a droplet of water on the part to help with the decal application.
Take the decal out of the water and hold it over the area it will be attached to. If the paper has absorbed enough water, the decal should easily slide off with a light push. Waterslide decals are extremely delicate, and the larger they are, the more prone they are to tearing or folding - so be as gentle as possible. Push the decal into position while it is still significantly wet. Add a drop of water if it is already starting to cling to the part before you're done moving it.
Once the decal is aligned the way you want, take a cotton swab or paper towel and touch it near the edge of the decal such that it "sips" the water out from under it. You should see the decal hug the surface of the part as the water is absorbed. Readjust the decal quickly if this causes it to shift. When you are satisfied with the final position, gently press down on the center of the decal with a cotton swab and roll the tip towards the sides. This action should force all the remaining water out from under the decal, fixing it in place.
If the decal shifts again, you may still be able to adjust it by immediately adding a droplet of water near an edge before it is completely dry. Do this too many times though, and the decal may loose adhesion completely. Once dried in place, the decal may look slightly embossed on the surface. If you wish to flatten it down and give it that painted-on look, you may apply a decal solution like Mr. Mark Softer. Once the decal is treated with solution, there is no easy way to remove it, so make sure you are 100% happy with your decal placement.
Decals from different manufacturers may also react differently to the solution, so I recommend testing this out on a spare decal applied to a similarly painted spoon first. That's all there is to it! Remember to apply another layer of clear (or matte) to preserve your work.
Decal application is one of my favorite activities, as it adds colorful detail that would otherwise be impossible to achieve even with the finest brush and the steadiest of painting hands. That said, try not to overdo it, or your kit may end up looking like a Jeepney. :)
Until next time, keep building plamo!
*jeepney pic borrowed from google images


No comments:
Post a Comment