

Click on the read more link for the rest of this post...

With that out of the way, I moved on to the weathering and detailing phase. The internal frame was reassembled and dry-brushed with enamel silver...

Once the frame was dry, I reattached the armor in preparation for weathering. I find it easier to work with sub-assemblies, so I get a feel of how the detailing is distributed and keep myself from overdoing it. Tamiya black panel liner was applied first.


I always make up a bit of back-story for my custom builds - it helps me stay focused and stick to a solid plan. This particular GM is assigned to a mountain outpost. The once pristine paint job has been tarnished by the harsh climate and daily patrol duties. Thanks to an unmatched range and a camouflaged roost on the mountainside, it's already taken out a handful of Zeon mobile suits on recon missions.
With that concept in mind, I started on the paint chipping.


I used the sponge technique to apply a dark brown mix of enamel. I tried to limit the paint chips to areas on the armor where there was frequent surface contact, mostly around corners and edges. I then used a toothpick to apply a tiny bit of silver to some of the chips to represent bare metal. This was applied to the entire kit.
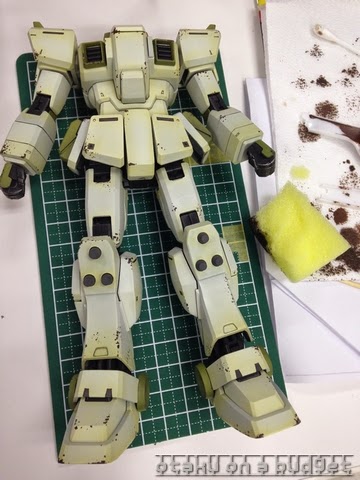


Next up was to add some of the dry-transfer decals that came in the box. In hindsight, I should have applied these before the paint chipping. Luckily none of the chips would be covered up by the decals. Some decals were nicked on purpose to add to the weathered effect.


After that, I used Tamiya weathering compacts for some grime and a bit of rust...


With only a few minor touch-ups and flat coat left on my to-do list, I'm looking to finish this guy in a couple of days. I'll be working on the MG Kampfer next - and I have to say I'm really excited to revisit a kit I built two years ago, with the experience I now have.

Stay tuned for the final photo-shoot of the finished kit. Until next time, keep building plamo!
No comments:
Post a Comment